
Now that you’ve gathered your ingredients, it’s time to get cooking. This jam recipe is relatively simple and doesn’t require complicated equipment. Just follow these easy steps to make your own batch of Christmas Jam:
Step 1: Prepare the Fruits
Start by washing and preparing your fruits. Rinse the cranberries thoroughly, removing any damaged berries. Peel and chop the orange into small pieces, making sure to remove any seeds. Zest the orange as well, being careful not to get the bitter white pith. Chop the apples into small cubes, leaving the skin on for added texture and nutrients. If you prefer a smoother jam, you can peel the apples before chopping.
Step 2: Combine Ingredients in a Pot
In a large saucepan, combine the cranberries, orange pieces, apple cubes, and water. Stir in the granulated sugar, ground cinnamon, ground cloves, lemon juice, and vanilla extract. If you’re adding walnuts, mix them in at this point. Bring the mixture to a boil over medium-high heat, stirring frequently to ensure the sugar dissolves completely.
Step 3: Simmer and Cook the Jam
Once the mixture reaches a boil, reduce the heat to low and allow it to simmer. Stir occasionally to prevent burning. Let the jam cook for 25-35 minutes, or until the cranberries have burst, the fruit has softened, and the mixture has thickened to a jam-like consistency. If you want a smoother texture, you can use a potato masher or immersion blender to break up the fruit and make it more even. If you prefer a chunkier jam, simply leave it as is.
Step 4: Test the Jam’s Consistency
To check the jam’s consistency, take a small spoonful and place it on a cold plate. Let it cool for a few seconds, then run your finger through it. If it wrinkles and holds its shape, it’s done. If it’s too runny, continue to simmer for a few more minutes, checking every 5 minutes. If you’re using pectin to help thicken the jam, add it at the beginning of the simmering process and follow the instructions on the package.
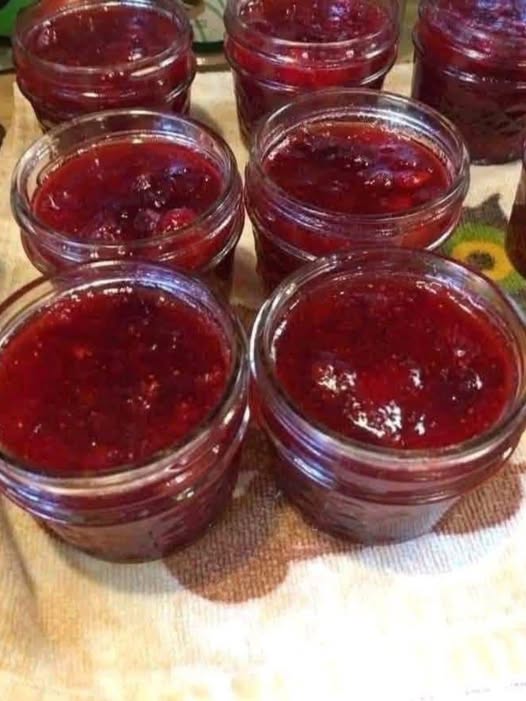
Step 5: Jar the Jam
Once your jam is thickened to your liking, remove the pot from the heat. Carefully ladle the hot jam into sterilized jars, leaving about 1/4-inch headspace at the top. Seal the jars with lids while the jam is still hot. If you plan to preserve the jam for longer storage, you can process the jars in a hot water bath for 10 minutes to ensure a proper seal. However, if you’re planning to use the jam within a couple of weeks, simply let the jars cool at room temperature before storing them in the fridge.
Serving and Storage
Christmas Jam is a versatile treat that can be served in various ways, adding a festive touch to any meal. Here are a few ideas for how to serve and store your jam:
- On Toast or Scones: Spread a generous layer of Christmas Jam on warm toast, biscuits, or scones for a delicious holiday breakfast or snack.
- As a Cheeseboard Accompaniment: Serve the jam alongside a selection of cheeses, crackers, and cured meats for a holiday-themed cheeseboard.
- In Desserts: Use Christmas Jam as a filling for pastries, tarts, or cakes. Its bright, fruity flavor pairs wonderfully with rich buttercream or whipped cream.
- Gift-Giving: Christmas Jam makes a thoughtful and homemade gift. Decorate the jar with festive ribbons, labels, and tags for a personal touch.
Storage
To store your Christmas Jam, place the sealed jars in a cool, dark place. Unopened jars can last up to a year if processed correctly. Once opened, store the jam in the refrigerator, where it will keep for up to 3 weeks. If you have leftover jam after the holidays, you can also freeze it for up to 6 months. Simply transfer the jam to freezer-safe jars or containers, leaving space for expansion, and label them with the date.
Tips
Here are some tips to help you achieve the best results when making your Christmas Jam:
- Use Fresh Ingredients: The fresher your fruit, the better your jam will taste. If you’re using frozen cranberries, make sure to thaw them before cooking.
- Adjust Sweetness to Your Taste: You can adjust the amount of sugar in the recipe depending on how sweet or tart you prefer your jam. If you want a less sugary jam, reduce the sugar slightly.
- Experiment with Spices: While cinnamon and cloves are traditional, you can experiment with other spices like nutmeg or ginger for a unique flavor twist.
- Make it Vegan: For a vegan version, simply swap out any animal-based products (like butter) with plant-based alternatives.
- Double the Recipe: If you plan to give the jam as gifts or preserve extra for later, feel free to double or triple the recipe. Just make sure to use appropriately sized pots to prevent overflow while cooking.
Conclusion
Christmas Jam is more than just a holiday spread; it’s a little jar of joy, capturing the flavors and scents of the season in each spoonful. Whether enjoyed on a cozy morning with toast, served as a topping for a holiday dessert, or gifted to friends and family, this festive jam will bring cheer to every occasion. With simple ingredients and easy steps, it’s a fun and rewarding way to celebrate the holiday spirit through food. So, gather your fruits, grab your jars, and let the magic of Christmas Jam fill your kitchen with warmth and deliciousness!
FAQ
<h
